A fireplace damper is the gatekeeper of warmth and efficiency in your home’s hearth. Dampers act as a control mechanism for airflow. They control the intensity of the fire and prevent precious heat from escaping up the chimney.
Therefore, ensuring your fireplace damper is in optimal condition is paramount for both safety and efficiency reasons. A malfunctioning damper not only compromises the performance of your fireplace but also poses potential hazards like poor ventilation and increased energy costs.
This guide is your roadmap for fireplace damper repair, packed with expert tips for effective results.
So, let’s get straight to it!
Signs of a Damaged Fireplace Damper
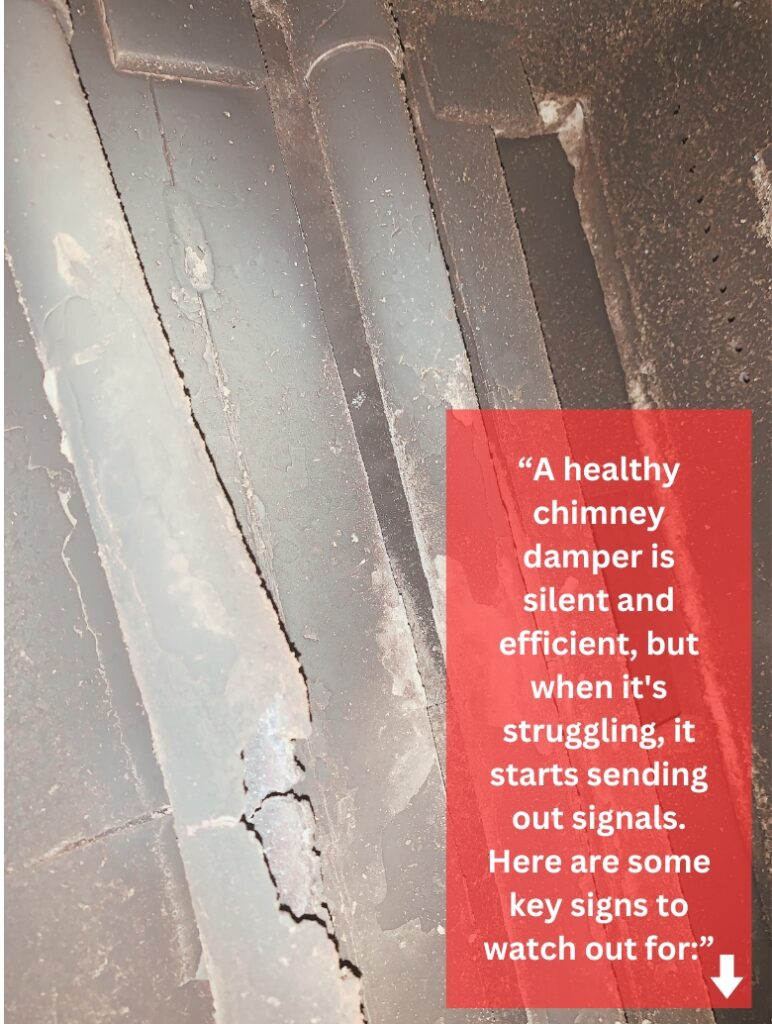
A healthy chimney damper is silent and efficient, but when it’s struggling, it starts sending out signals. Here are some key signs to watch out for:
Rust and Corrosion
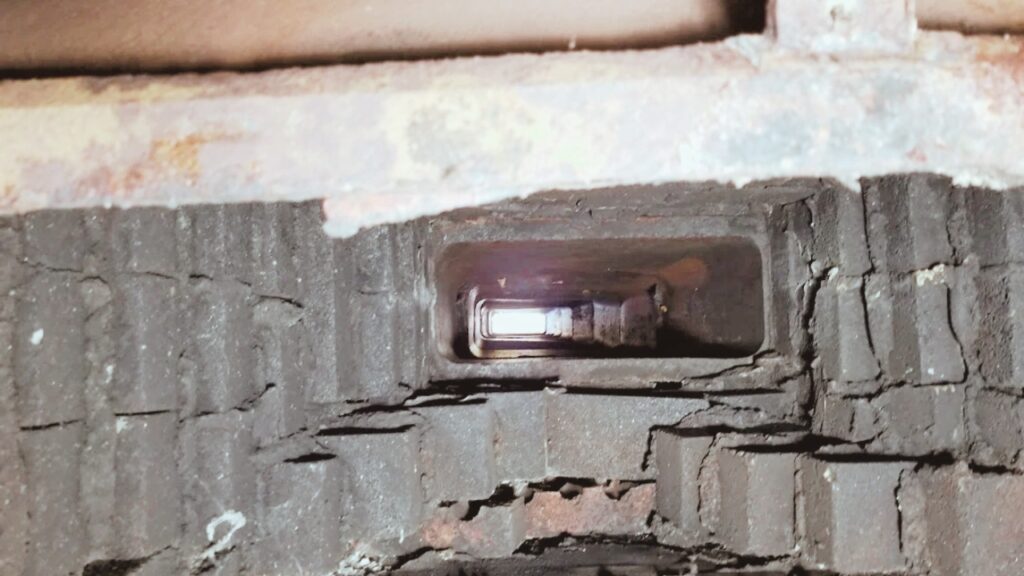
Keep an eye out for reddish-brown discoloration, flaking, or pitting on the metal damper. This issue can occur with both your throat damper and top mount damper.
These are classic signs of rust and corrosion, often caused by moisture exposure from leaks, condensation, or improper ventilation. When these symptoms appear, it might be time to consider fireplace damper removal. Removing a damaged damper is essential to prevent further deterioration and ensure the safety and efficiency of your fireplace
Rust and corrosion can weaken the damper, making it difficult to open or close smoothly. In severe cases, it can even seize up completely, rendering the fireplace unusable and potentially posing a safety hazard.
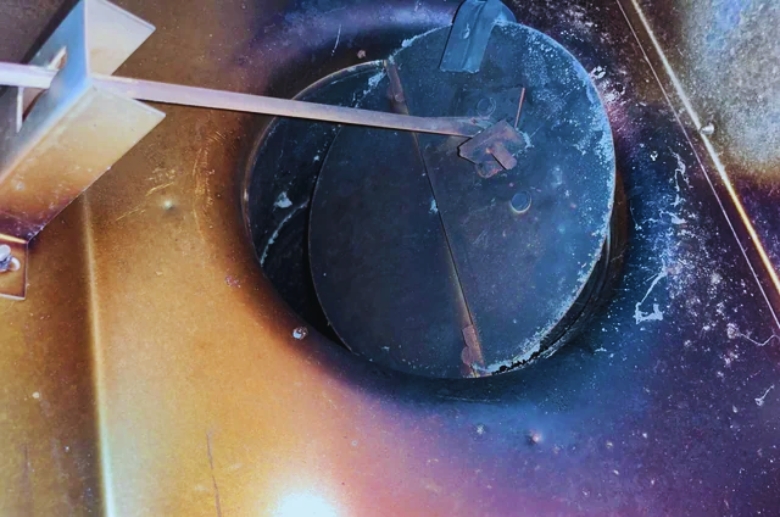
Damper Stuck Closed
Several factors can contribute to a stuck-closed damper, including rust, warped components, debris buildup, or even a misplaced object.
The bad news is a closed damper blocks vital airflow necessary for combustion. That lack of airflow can result in poor fire performance, smoky backdrafts, and potential carbon monoxide poisoning.
Damper Stuck Open
Similar to a stuck-closed damper, various culprits can be at play here, including warped components, binding mechanisms, or even a malfunctioning control handle.
An immovable open damper is like leaving a window open all year round. It allows precious warm air to escape from the chimney, leading to decreased heating efficiency and higher energy bills.
——
Do You Need to Hire Chimney & Fireplace Expert?
Get free quotes from qualified experts near you. No commitment required!
——
Drafts and Air Leaks
Even if your damper appears to function properly, pay attention to drafts coming from the fireplace. Drafts could indicate:
- Leaking damper seal: The seal around the damper might be worn or damaged, allowing air to leak through even when the damper is closed.
- Cracked or damaged flue: Cracks or gaps in the chimney flue can create pathways for drafts to enter the home.
The consequences? The constant flow of cold air cools the room, forcing your heating system to work harder, leading to higher energy bills.
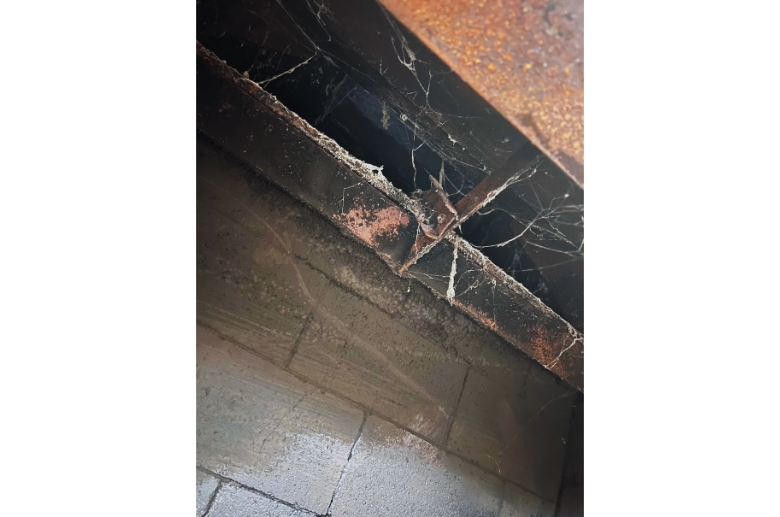
Water Leakage or Debris in the Firebox
Signs of water intrusion include visible water stains, rust on the damper and surrounding metalwork, and dampness in the firebox.
Check for debris, such as leaves and twigs, or small animals, like squirrels, raccoons, or bats, that may have become trapped around the damper.
Both water and debris can damage the damper itself and contribute to other issues like rust, corrosion, and blockages. Additionally, water leakage can lead to mold growth.
The presence of mold growth in the fireplace can trigger allergic reactions, including sneezing, a runny nose, wheezing, coughing, fatigue, headaches, and watery eyes.
Those most susceptible to these reactions are children with underlying respiratory conditions such as asthma, and the elderly, whose immune systems may be compromised.
Is It Possible to Perform a DIY Inspection to Identify Fireplace Damper Issues?
It’s possible to perform a basic DIY inspection to identify some potential issues with your fireplace damper. However, the extent and accuracy of your inspection will be limited compared to a professional. Here’s what you can do:
Step 1. Visual Inspection
Turn off the fireplace and allow it to cool completely. Afterward, use the control to fully open the fireplace damper (if manual) or turn off the power (if electric).
Examine the damper plate, hinges, and surrounding areas for any signs of rust, corrosion, or debris buildup. Pay attention to the damper seal and ensure it is intact and free from gaps or tears.
Additionally, check for creosote buildup or debris that may obstruct the damper’s movement. Inspect the chimney flue for any signs of damage or blockages.
Step 2. Smoke and Draft Testing
For this inspection, close all windows and doors in the room with the fireplace and ensure there is no significant airflow. Light a small amount of newspaper or kindling in the fireplace to create smoke.
Observe the direction of the smoke. If it enters the room instead of being drawn up the chimney, it may indicate a problem with the damper or chimney draft.
To test the draft, hold a lit candle near the damper opening and observe the flame. If the flame flickers or is drawn toward the opening, it indicates a strong draft, which is essential for proper fireplace ventilation.
Conversely, if the flame remains steady or is pushed away from the opening, it may indicate a draft issue that needs attention.
Step-by-Step Guide to Fireplace Damper Repair
While professional assistance is always recommended for complex repairs, you can tackle some straightforward issues yourself with the right knowledge and tools.
Before we dive into specific steps, let’s address the fundamentals:
Tools Needed
The specific tools required will depend on the issue you’re addressing. However, some general items you might need include:
- Wrenches: To loosen and tighten nuts and bolts.
- Screwdrivers: For removing and replacing screws.
- Wire brush: This is used to remove rust and debris.
- Steel wool: For finer rust removal and polishing.
- Leather gloves: To protect your hands from cuts and heat.
- Metal file: For smoothing rough edges.
- Vacuum cleaner: To remove dust and debris.
- Replacement damper (if needed): Ensure it’s compatible with your fireplace model.
- High-temperature sealant: This is used to address air leaks around the damper.
- Silicone lubricant (optional): For lubricating moving parts (not on high-friction areas).
Remember, consult your user manual or a professional before using any specific tools or materials.
Safety Precautions
Safety first! Before starting any repairs:
- Ensure the fireplace is completely cool and the damper is closed.
- Spread a drop cloth to protect the surrounding area from debris.
- Turn off the gas supply if you have a gas fireplace.
- Open windows and doors for ventilation.
- Never use flammable liquids or cleaners near the fireplace.
- If you encounter any electrical components, stop immediately and consult a qualified electrician.
- Know your limits, and only attempt repairs within your expertise or comfort level.
Step 1. Rust Removal and Prevention
As explained earlier, rust can hinder your damper’s movement and lead to further damage. Here’s how to address it:
- Brush off loose rust and debris with a wire brush.
- For deeper rust, use steel wool with caution to avoid damaging the metal.
- Wipe the damper with a damp cloth to remove dust.
- Apply a rust converter to affected areas according to the product instructions.
- Once the rust converter has neutralized the rust, let it dry completely.
- To prevent future rust, apply high-temperature paint specifically designed for metal surfaces.
Note: If the rust is extensive or the damper is severely damaged, replacement might be necessary.
——
Do You Need to Hire Chimney & Fireplace Expert?
Get free quotes from qualified experts near you. No commitment required!
——
Step 2. Unsticking a Damper
A stuck damper can be frustrating but often fixable:
- Start by identifying the cause of the stuck damper (rust, debris, misalignment).
- If the damper is stuck due to rust, follow the rust removal steps mentioned above.
- Carefully remove any debris blocking the damper or its mechanism.
- Check for misalignment and gently try to reposition the damper into its correct position.
- If the damper is still stuck, apply a small amount of silicone lubricant (not on high-friction areas) to moving parts.
- Avoid forcing the damper, as this could cause further damage.
Caution: Never use excessive force or pry on the damper, as this can break it.
Step 3. Draft and Air Leak Fixes
Drafts and air leaks around the damper can affect performance and efficiency. Here are some DIY solutions:
- Use a high-temperature sealant to seal any gaps or cracks around the damper. Follow the product instructions carefully and ensure the sealant is suitable for fireplace applications.
- Replace worn-out damper gaskets with new ones. Gaskets ensure a tight seal between the damper and the flue.
- Check for cracks or damage in the flue liner. Repairing or replacing the flue liner might require professional assistance.
Remember: These are basic solutions for minor air leaks. For extensive leaks or suspected flue damage, consult a qualified chimney sweep.
Should I Hire a Professional Chimney Sweep?
While the DIY steps outlined above can address some common damper issues, there are certain situations where seeking professional help is crucial. Here’s how to decide.
When to Call a Pro
Here’s when you should not compromise and only leave the job to the professionals:
- Complex Repairs: If your damper is severely damaged, rusted beyond repair, misaligned, or requires replacement, DIY attempts can worsen the problem. A professional has the expertise and tools to handle complex repairs safely and effectively.
- Safety Concerns: If you suspect flue damage, gas leaks, or extensive rust affecting the damper’s structural integrity, prioritize safety and call a professional immediately. They can identify potential hazards and recommend appropriate solutions.
- Lack of Confidence: Admit your limitations! If you’re unsure about tackling the repair yourself, hesitant about any step, or uncomfortable working with tools or heights, seek professional assistance.
- Peace of Mind: Even for seemingly straightforward repairs, a professional inspection can offer valuable peace of mind. They can ensure the job is done right, identify potential future issues, and advise on preventative measures.
Why Professional Inspections are Necessary
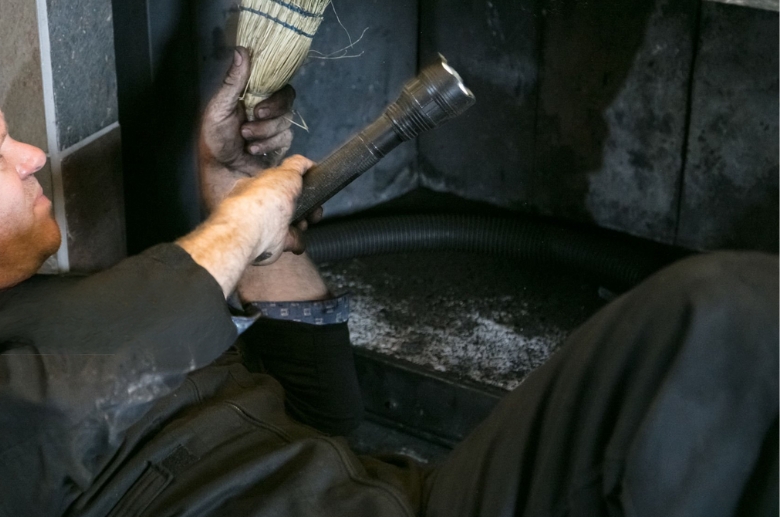
Regular inspections by a qualified chimney sweep are vital for maintaining your fireplace damper and ensuring its optimal performance and safety. These inspections involve:
- Thorough visual examination: The sweep will inspect the damper for signs of rust, damage, misalignment, and proper operation.
- Draft testing: They will assess the flue’s draft to ensure proper airflow and prevent smoke backdrafts.
- Creosote buildup check: They will inspect for creosote buildup, a dangerous byproduct of combustion that can ignite and cause chimney fires.
- Cleaning and maintenance: They will clean the damper and flue, lubricate moving parts, and perform any necessary maintenance to ensure smooth operation.
——
Do You Need to Hire Chimney & Fireplace Expert?
Get free quotes from qualified experts near you. No commitment required!
——
These inspections help identify potential problems early on, preventing costly repairs and ensuring your fireplace operates efficiently and according to safety codes.
DIY vs. Professional Costs
Here’s a breakdown of the estimated costs associated with both DIY and professional damper repair:
DIY Damper Repair
Material Costs:
- Tools: $20-$100 (wire brush, steel wool, screwdriver, wrench, etc.)
- Replacement damper (if needed): $50-$300 (depending on complexity and model)
- Rust converter and sealant: $10-$30
- Lubricant (optional): $5-$10
Total Material Cost: $85-$440
Labor Cost: Since you’re doing the work yourself, there’s no direct labor cost. However, factor in the time investment involved in research, acquiring tools, completing the repair, and potential troubleshooting.
Professional Damper Repair
Service Cost:
- Inspection and diagnosis: $75-$150
- Simple repair (lubrication, minor adjustments): $150-$300
- Damper replacement: $300-$800 (depending on complexity and model)
Total Service Cost: $325-$800+
Conclusion
Your fireplace damper plays a crucial role in safety, efficiency, and enjoyment. While minor issues might tempt a DIY fix, remember:
- DIY fireplace damper repair can be cost-effective for minor issues, but prioritize safety and seek professional help if unsure.
- Professionals ensure proper diagnosis, safety protocols, and guarantees, offering peace of mind and potentially saving you money in the long run.
Don’t wait for problems to arise! Schedule regular professional inspections and cleanings to maintain a healthy damper and prevent costly repairs down the line.