Chimney leaks are a common issue most property owners across the United States face. These leaks can result from various factors, from aging materials to poor construction and external environmental influences.
If you’re experiencing any issues with your chimney, it’s crucial to prioritize chimney leak repair services. A chimney free from leaks preserves the structural integrity of your entire house and ensures effective ventilation of harmful gases.
In this comprehensive guide, we’ll uncover the common causes of chimney leaks, empowering you to identify the source of the problem. We also explore various DIY methods to repair and prevent leaks in chimneys.
Common Causes of Chimney Leaks
Several factors contribute to chimney leaks. However, some occur more often than others. Below, we explore the common causes of chimney leaks and their impact on your chimney’s integrity.
1. Cracks and Gaps in the Chimney Crown
Over time, exposure to weather elements, freeze-thaw cycles, and normal wear and tear can cause cracks and gaps in the crown. These cracks let water seep into the interior masonry, leading to chimney leaks in heavy rain.
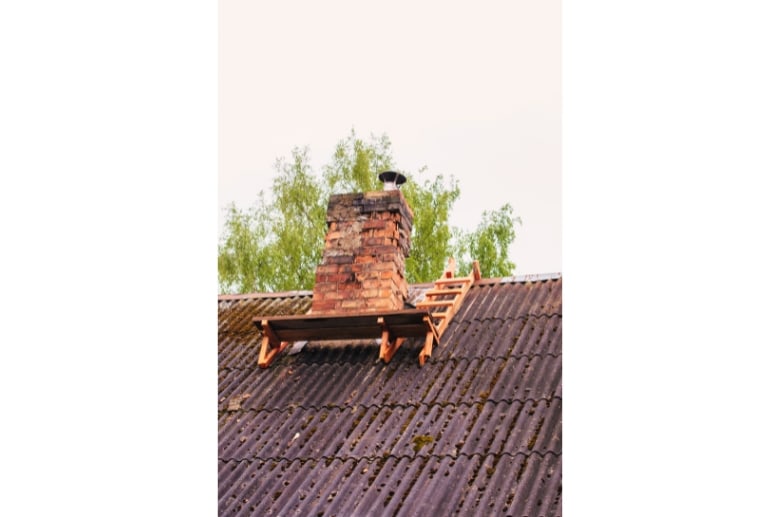
2. Damage to the Flashing
Flashing creates a watertight seal that prevents water from infiltrating the vulnerable joint between the chimney and the roofing material. However, it can get damaged over time due to wind, corrosion, or improper installation. This makes it lose its effectiveness, leading to water finding its way into the structure.
——
Do You Need to Hire Chimney & Fireplace Expert?
Get free quotes from qualified experts near you. No commitment required!
——
3. Worn Out Sealant or Caulk
Sealant or caulk fills gaps and joints around the chimney, providing additional protection against water intrusion.
However, sealant has a limited lifespan and can degrade over time due to exposure to sunlight, temperature changes, and moisture. When this happens, it becomes brittle or cracks, allowing water to penetrate and cause leaks.
4. Mortar Deterioration
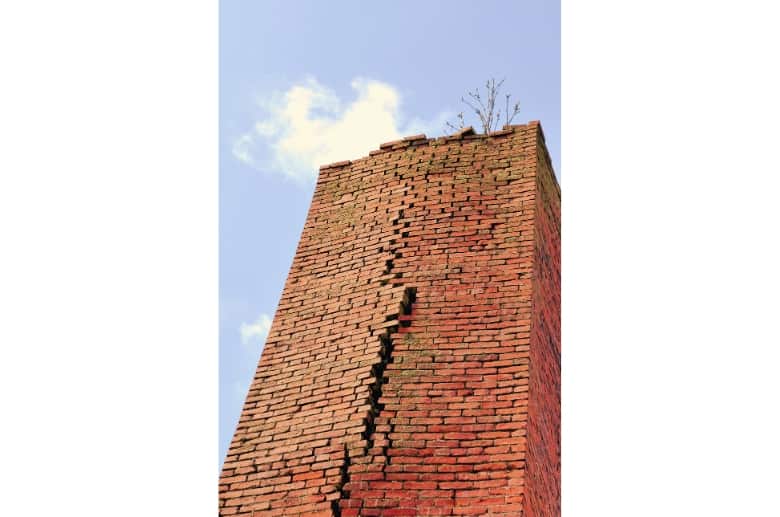
The mortar joints between the bricks or stones of the chimney deteriorate due to harsh weather and age. And as mortar erodes, gaps form in the masonry, allowing water to enter your home, causing significant damage to the chimney’s interior.
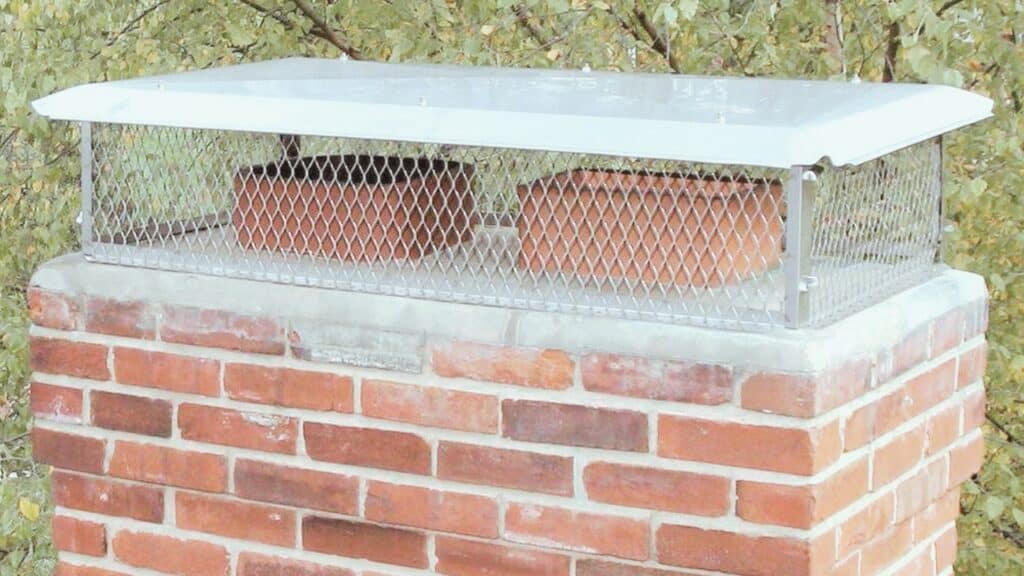
5. Absence or Damage of Chimney Caps
These protective covers at the top of the chimney keep rainwater and debris out of the flue and prevent animals from nesting inside. If your chimney cap is missing or damaged, rainwater directly enters the flue, causing leaks and other chimney-related problems.
6. Condensation in the Roof
Condensation is common, especially in cold climates. When warm, moist air inside the house meets the cold roof surface, it condenses and forms water droplets. This causes water to accumulate around your chimney and leak into the structure.
What Are the Dangers of Unchecked Chimney Leaks?
Unchecked chimney leaks can pose serious risks to your home’s structure and interior. As a result, homeowners can experience the following dangers associated with neglecting chimney leaks:
- Water damage to the attic, walls, and ceiling.
- Deterioration of masonry and brick.
- Condensation problems inside the house.
- Electrical hazards.
How to Detect a Chimney Leak
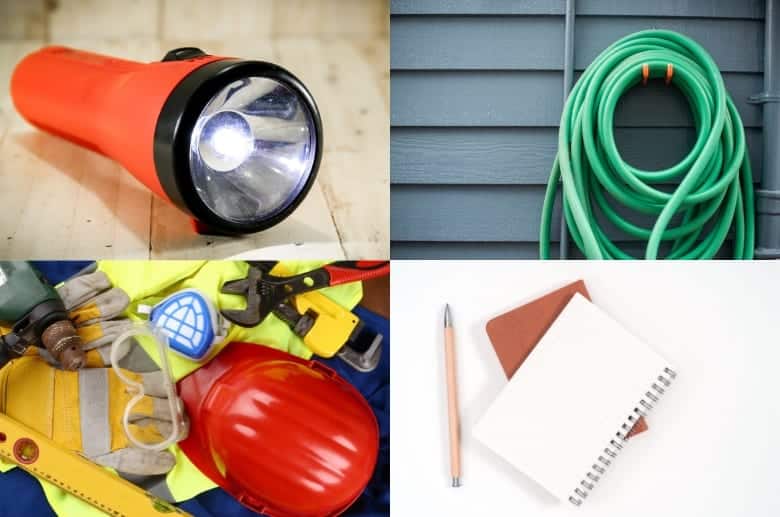
Detecting chimney leaks early on is crucial to prevent potential damage to your home. But first, here are the tools you’ll need for the job:
- Flashlight
- Hose with a controllable spray nozzle
- Smoke source (commercial smoke candle or smoke machine)
- Protective gear
- Notebook or camera
Methods for Detecting Leaks
You can use the following methods to detect chimney leaks in your home.
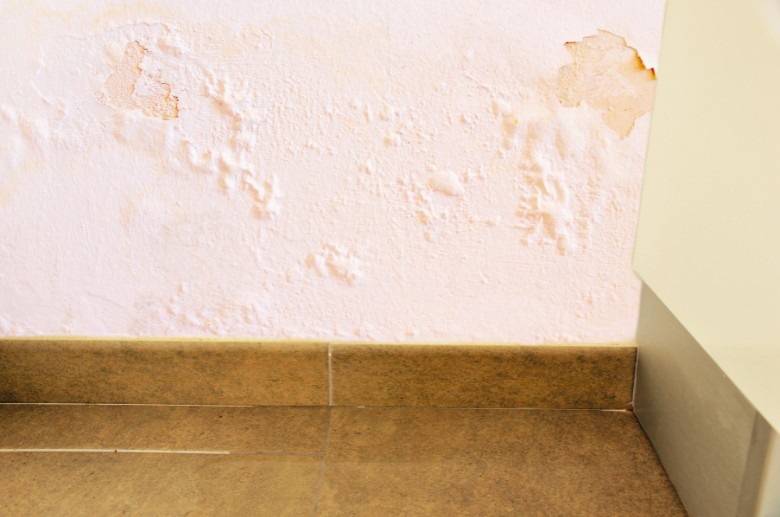
- Visual Inspection: Look for signs of water stains, discoloration, or peeling paint on the walls and ceilings near the chimney. On the exterior, check for cracks in the chimney crown, damaged flashing, or missing chimney caps.
- Water Testing: Use a hose to direct water onto different parts of the chimney and shingles while having someone monitor for signs of water infiltration inside the house. This can help pinpoint the source and location of the leak.
- Smoke Test: A smoke test involves creating smoke inside the fireplace and observing if smoke escapes from unintended openings in the chimney. This test can help identify hidden cracks or gaps that might not be visible during the initial inspection.
——
Do You Need to Hire Chimney & Fireplace Expert?
Get free quotes from qualified experts near you. No commitment required!
——
Signs of a Leaking Chimney
Recognizing the signs of a leaking chimney is essential to address the issue promptly and prevent further damage to your home. Below are common indicators of chimney leaks to look out for:
- Water stains on the ceiling and walls around the fireplace
- Damp smell or visible moisture in the attic
- Rust on the fireplace doors, accessories, or damper
- Damaged wallpaper
- Mold growth
Importance of a Thorough Chimney Inspection
A thorough inspection of a chimney is crucial to ensure its proper functioning, identify potential issues, and maintain the safety and integrity of the entire structure. Here are reasons why conducting a comprehensive chimney inspection is essential:
Safety Assurance
A thorough chimney inspection helps identify structural issues, cracks, or damage that may compromise the chimney’s stability. Addressing these problems can prevent hazards such as chimney collapse, fire risks, or releasing harmful gases into the home.
Early Detection of Leaks and Water Damage
Regular inspections allow early detection of chimney leaks and water damage. Timely identification of these issues can prevent extensive water infiltration, which could lead to costly repairs, mold growth, and damage to the home’s interior and exterior.
Prevention of Costly Repairs
Conducting thorough inspections can identify and address minor issues before they escalate into major problems. Taking care of small repairs is more cost-effective than dealing with significant damage that may require extensive renovations or chimney replacement.
Optimal Performance
A well-maintained chimney performs efficiently and effectively. A thorough inspection ensures that the chimney components, like the flue, damper, and liners, are in good working condition. This allows for proper ventilation and optimal fireplace or heating system performance.
DIY Solutions for Chimney Leak Repair: A Step-by-Step Guide
DIY Solutions for Chimney Leak Repair: A Step-by-Step Guide
Although most chimney leak problems require professional help, minor repairs can be handled with do-it-yourself (DIY) solutions. Here’s a step-by-step guide to help you with some of these repairs.
1. Patching Up the Leak
Here are DIY steps to patch up a leak in your chimney:
- Step 1: Locate the Leak – Inspect the chimney’s interior and exterior to identify the leak’s source. Look for cracks, gaps, or damaged masonry.
- Step 2: Prepare the Surface – Clean the area around the leak with a wire brush to remove debris and loose materials. Ensure the surface is dry before proceeding.
- Step 3: Apply Patching Material – Use a high-quality chimney repair patch or waterproof sealant to cover the leak. Apply the patch evenly, following the manufacturer’s instructions.
- Step 4: Let it Cure – Allow the patching material to dry and cure according to the recommended time frame before using the chimney.
2. Replacing the Chimney Cap
The following steps will help you with replacing the chimney cap:
- Step 1: Remove the Old Cap – If your chimney cap is damaged or missing, carefully remove it by loosening any screws or bolts holding it.
- Step 2: Measure and Choose the New Cap – Take accurate measurements of your chimney’s dimensions to select a suitable replacement cap. Ensure the new cap is made of durable and weather-resistant material.
- Step 3: Install the New Cap – Follow the manufacturer’s instructions to install the new chimney cap securely. Use screws or bolts to fasten it in place.
- Step 4: Check for Stability – Ensure the new cap is stable and fits snugly on the chimney. Make any necessary adjustments to ensure a proper fit.
3. Repairing the Flashing
If your chimney flashing has minor problems, here are the steps to address them effectively:
- Step 1: Inspect the Flashing – Examine the flashing around the chimney for signs of damage, rust, or gaps between the flashing and the roof.
- Step 2: Clean the Area – Clear any debris or dirt around the flashing to ensure a clean surface for repair.
- Step 3: Apply Flashing Sealant – Use a high-quality flashing sealant or roofing cement to fill gaps or repair damaged flashing. Apply it evenly and make sure it creates a watertight seal.
- Step 4: Check for Proper Sealing – After applying the sealant, inspect the flashing to ensure no visible gaps or areas that might allow water penetration.
4. Sealing or Caulking Cracks and Gaps
Here are comprehensive steps to effectively seal or caulk any cracks and gaps in your chimney:
- Step 1: Identify Cracks and Gaps – Inspect the chimney crown, masonry, and other components for cracks and gaps where water might infiltrate.
- Step 2: Clean and Prepare the Surface – Clean the area around the cracks and gaps, removing any loose mortar or debris.
- Step 3: Apply Sealant or Caulk – Use a high-quality chimney sealant or caulk to fill in the cracks and gaps. Make sure to work the material into the crevices for a complete seal.
- Step 4: Allow for Drying – Let the sealant or caulk dry and cure according to the manufacturer’s instructions before subjecting the chimney to moisture.
How to Know if a Method Has Successfully Fixed the Leak
After applying a repair method to fix a chimney leak, verifying its effectiveness is essential to prevent further water infiltration. Here are ways to determine if the repair has been successful:
- Visual inspection
- Water testing
- Monitor over time
- Seek professional opinion
When to Call a Professional and The Process of Professional Repair
While you can address some chimney leak problems yourself, certain situations warrant professional assistance. So, let’s help you discern when you need to call in the professionals.
——
Do You Need to Hire Chimney & Fireplace Expert?
Get free quotes from qualified experts near you. No commitment required!
——
Identifying When Professional Help is Needed
Here are key indicators that indicate the need for expert help:
Structural Damage
You must call a contractor if you notice significant structural damage to your chimney, such as cracks, leaning, or masonry deterioration. Structural issues can compromise the stability and safety of the chimney, posing a risk to people and everything in your home.
Persistent Leaks
If you’ve attempted DIY repairs, but the chimney continues to leak or the leaks worsen, it’s time to seek professional help. Persistent leaks can signify more extensive problems that require a comprehensive assessment by a chimney company and specialized repair techniques.
Safety Concerns
Any safety-related issues, such as damaged chimney liners, blocked flues, or carbon monoxide leaks, demand immediate attention from a professional. These hazards can pose severe risks to your health and safety and should be addressed by a qualified chimney expert.
How Professionals Repair Chimney Leaks
Professional chimney leak repair involves a systematic approach to identifying the source of the problem and implementing effective solutions. Here’s a breakdown of the process and what to expect:
- Inspection: Thorough assessment of the chimney’s interior and exterior to pinpoint the cause of the leak.
- Damage Assessment: Evaluating the extent of the damage and identifying any underlying issues.
- Repair: Employing specialized techniques to address the problems identified during the inspection.
- Confirmation of Repair: Verifying the success of the repair through testing and follow-up inspections to ensure the leak has been effectively addressed.
Choosing a Professional Chimney Repair Service
Selecting the right chimney repair service is crucial to ensure quality work and the safety of your home. Consider the following points when making your decision:
- Check for proper licensing and certification
- Read reviews and seek recommendations
- Ask questions about experience and expertise
- Request a detailed estimate and information
- Double-check the details of their insurance coverage
Preventive Measures to Avoid Chimney Leaks
Taking proactive steps to prevent chimney leaks can save you from potential water damage and costly repairs. Here are effective preventive measures you can implement:
- Regular inspection and replacement of damaged parts
- Using quality materials and professional installations
- Proper chimney waterproofing
- Installing a chimney cap and flashing
Optimal Frequency for Chimney Maintenance
Maintaining a regular maintenance schedule for your chimney is essential to prevent leaks and ensure its proper functioning.
We recommend booking chimney maintenance at least once a year, including a qualified chimney professional’s annual inspection and cleaning.
Cost of Chimney Leak Repairs
Chimney leak repairs will cost you around $150 to $7,500. However, you’ll pay an average of $750 for most repairs. The table below shows the potential costs of chimney leak repairs:
| Chimney Leak Repair | Average Cost |
| Chimney flue repair | $255 to $1,100 |
| Liner Repairs | $2,200 to $7,500 |
| Chimney Cap Replacement: | $150 and $400 |
Comparison of DIY vs Professional Chimney Leak Repairs
When faced with a chimney leak, you’ll often contemplate whether to attempt DIY repairs or hire a professional service. Here’s a comparison of the pros and cons of these options:
Pros of DIY Chimney Leak Repairs
Why would you want to try it yourself? Here’s why:
- Cost savings
- Provides immediate action
- Gives room for a learning experience
Cons of DIY Chimney Leak Repairs
There are some disadvantages to trying this yourself:
- Limited expertise
- Safety risk due to lack of experience
- No warranty in case of injuries or damage
Pros of Professional Chimney Leak Repairs
Here are the advantages of seeking assistance from a chimney business:
- Expert knowledge to accurately diagnose and address the cause of the leak
- Quality materials, products, and tools for lasting repairs
- Long-term solutions
Cons of Professional Chimney Leak Repairs
Below are the disadvantages of professional chimney leak repairs:
- Higher cost of hiring quality professionals
- Scheduling repairs may take some time
- Lack of personal involvement
Factors Affecting the Cost of Chimney Repair
The cost of chimney repairs can vary significantly due to various factors that influence the complexity and scope of the work. Below are key factors that impact the overall cost of chimney repairs:
- Extent of damage
- Materials used
- Accessibility
- Professional reputation
- Additional repairs or services
Conclusion
Addressing chimney leaks is crucial to prevent water damage, structural issues, and safety hazards. Regular maintenance and professional repairs ensure the longevity and efficiency of the chimney system, saving you from costly and extensive damage in the long run.
Schedule a professional chimney leak repair service for inspection and maintenance to protect your home and enjoy a well-maintained chimney system. We are always available if you need to schedule an appointment and ensure the longevity of your chimney’s performance.