Limestone fireplaces stand out for their beauty, durability, and functionality. They enhance a home’s aesthetic appeal and provide warmth and comfort, making them a great addition to any living space.
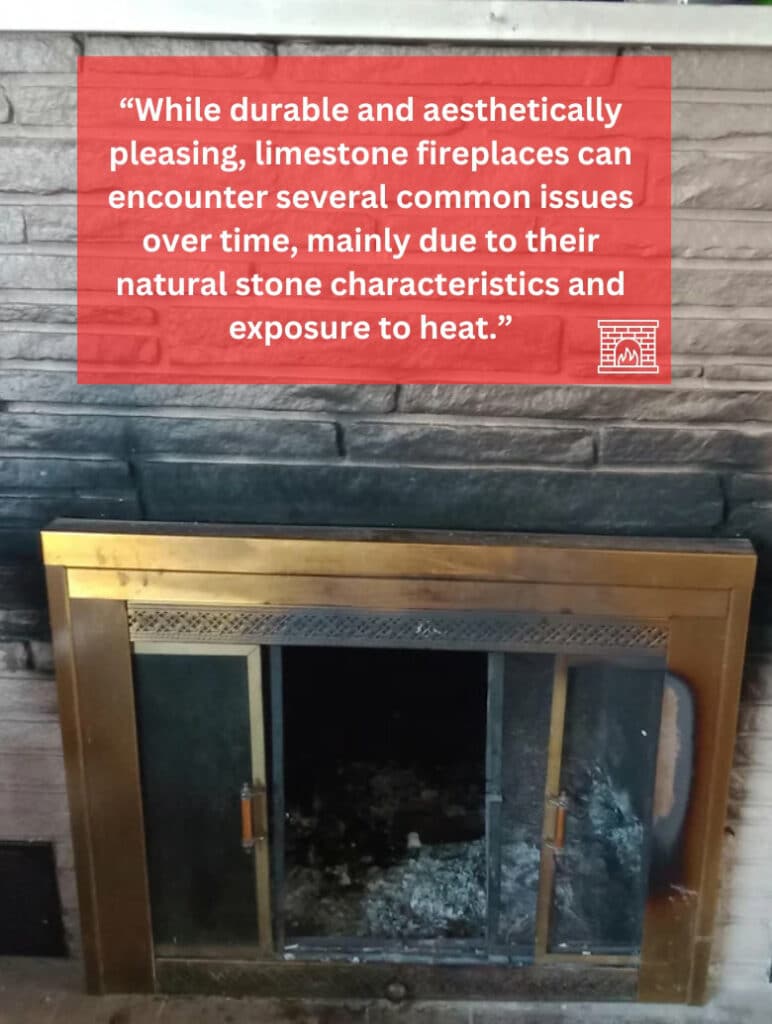
While durable and aesthetically pleasing, limestone fireplaces can encounter several common issues over time, mainly due to their natural stone characteristics and exposure to heat. In this post, we’ll discuss limestone fireplace repair problems, how to fix them, and additional tips for maintaining your fireplace.
Can You Repair a Limestone Fireplace?
Yes, you can repair limestone fireplaces. For this, you need to prepare the right materials and follow guidelines to ensure you maintain its durability and aesthetic appeal.
For significant fireplace repairs, such as structural issues, you’ll need a professional to help you fix it. It’s best to consult someone who is experienced in working with limestone fireplaces, as they can ensure that their integrity and appearance are maintained.
Common Limestone Fireplace Issues
The most common issues with limestone fireplaces are due to their natural stone characteristics and the environmental conditions they’re exposed to. Let’s examine the key issues that often warrant immediate limestone fireplace repairs.
1. Staining
Because limestone is porous, it’s susceptible to staining from spills, soot, and ash. If it’s not properly sealed during installation, these substances can penetrate the surface, leading to difficult-to-remove stains that ruin the appearance of the stone.
To address this issue, clean the surface with a mild detergent or stone cleaner specially designed for limestone. Tougher stains may require more serious cleaning solutions like poultice.
Sealing the limestone can prevent staining in the future. Use a high-quality penetrating sealer, which fills the stone’s pores and prevents liquids and stains from penetrating deep into the surface.
You can also utilize fireplace tools like screens or glass doors to contain soot and ash and prevent them from coming into direct contact with the limestone.
2. Etching
Contact with acidic substances can etch the limestone’s surface, causing dull spots or rings that are noticeable against the stone’s finish. It occurs because acid reacts with the calcium carbonate in the limestone, damaging its polished or honed finish.
Avoid contact with acidic substances like lemon juice, vinegar, or even some hard-surface cleaners. In the event of a spill, take action immediately to minimize the damage.
Start by blotting up the spill with a clean, dry cloth, removing as much acidic liquid as possible. Do not wipe the spill because this will only spread the acid over the limestone.
Once you’ve blotted up the spill, apply a neutralizing solution to counteract the acidic residue on the limestone. A mixture of water and baking soda or water and ammonia is a common solution.
Apply the solution to the area using a soft cloth or sponge. Then, rinse thoroughly with water.
3. Cracks and chips
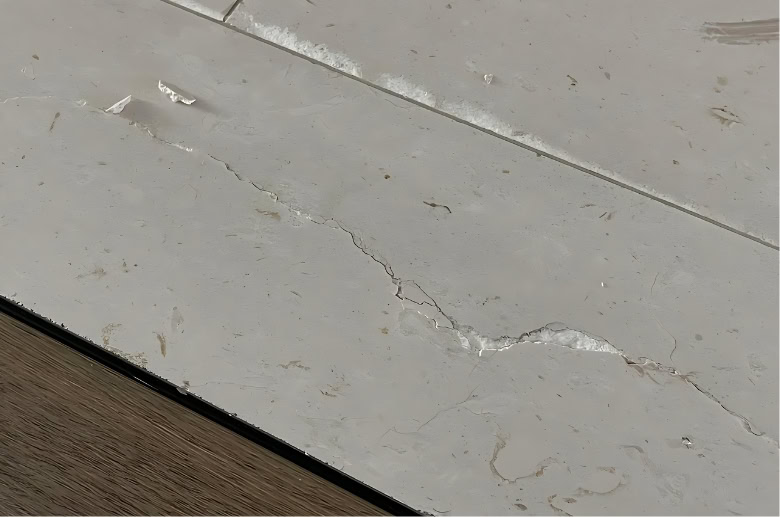
Limestone can crack or chip due to physical impacts, heavy weights placed on it, or even natural settling and shifting of the structure. This thermal cycling can lead to the formation of cracks, especially if there are already weak points in the stone. Repair methods for this issue can range from a simple filling for minor chips to more extensive patching or replacement for larger cracks.
For minor chips, you’ll use a stone repair epoxy or filler that’s specially designed for limestone. Larger cracks or structural damage will require a consultation with a professional, as they can assess the extent of the damage and recommend the best repair solution, which may involve epoxy injection or stone replacement. Ultimately, the goal is to restore the limestone fireplace to its original appearance.
4. Erosion and wear
Regular use and cleaning over time can lead to the erosion of the limestone surface, particularly in high-use areas. It might appear as a general dulling of the surface, rounding of crisp edges, or even the formation of small pits.
For minor erosion or wear, you can lightly sand the surface with fine-grit paper, removing any rough spots to make it smooth again. If the fireplace has significant erosion or wear, it’s worth talking to a professional stone restoration expert. Again, they will check the limestone fireplace for damage and recommend the best course of action. This may include repolishing the surface or filling in pits with matching limestone filler.
This issue can be avoided by using gentle cleaning methods and steering clear of abrasive materials or harsh chemicals. If you place items above your fireplace, place protective mats or coasters underneath them and make sure the weight is distributed evenly. This minimizes direct contact and prevents localized wear.
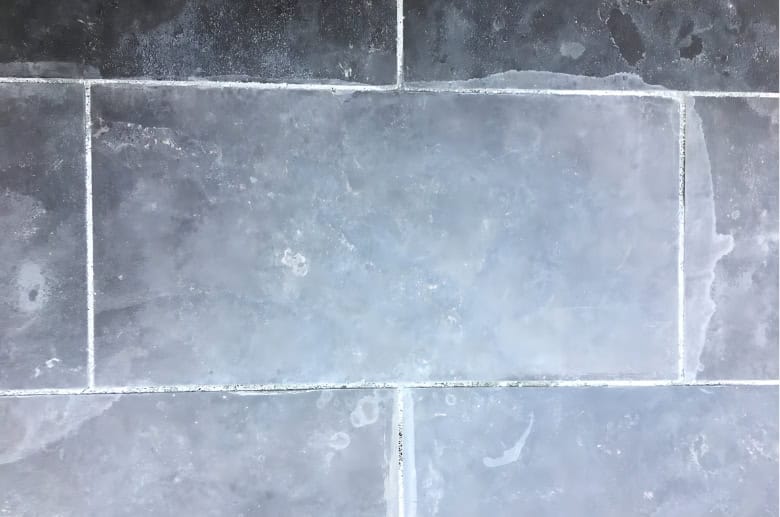
5. Efflorescence
When water comes in contact with the limestone surface and evaporates, it leaves behind salt residues that are white and powdery. It’s called efflorescence, and it can often occur in areas with high moisture levels. For existing efflorescence deposits, you can clean the affected area with a mild detergent or stone cleaner. Rinse it after with clean water and let it dry completely.
Addressing the source of excess moisture, such as leaking pipes, poor drainage, or condensation buildup, can prevent efflorescence problems in the future. Applying a breathable sealer repels moisture and prevents salt residues from forming.
6. Soot accumulation
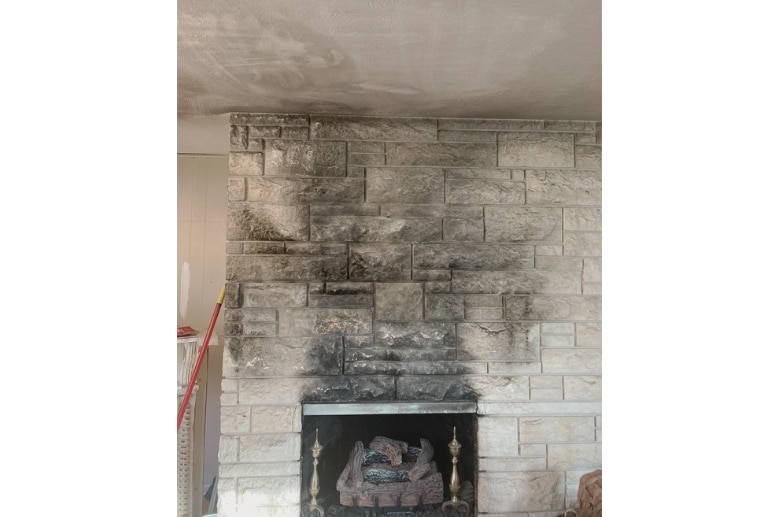
Soot is a common issue with any fireplace. However, it can be particularly challenging in limestone, as the stone is very porous. If not addressed immediately, it can lead to permanent discoloration and surface wear.
It’s best to take a proactive approach to cleaning since this will prevent soot buildup from becoming ingrained in the stone. As soon as you notice loose soot on the limestone, clean it immediately with a soft-bristled brush.
For mild stains, just wipe with a soft cloth dipped in a mixture of warm water and mild dish soap. More stubborn soot stains might require poultice applications to help draw out soot from the limestone’s pores.
7. Mold and mildew
In areas with high moisture and poor ventilation, limestone can become a breeding ground for mold and mildew. This can lead to potential health issues and damage to the stone’s surface.
You can prevent this from happening by improving the ventilation and reducing the humidity in the surrounding areas of the fireplace. Dehumidifiers and exhaust fans are great tools for creating an environment that’s less conducive to mold and mildew growth.
For existing mold and mildew, you can scrub the affected area with a solution of water and mild detergent. Stubborn growth can be better removed with a mixture of equal parts water and white vinegar or hydrogen peroxide. These are strong enough to remove mold and mildew but not too harsh that they damage the stone.
Repairing Minor Chips and Cracks in a Limestone Fireplace
Repairing minor chips and cracks in a limestone fireplace is straightforward, provided it is done carefully and with the right materials. Here is a step-by-step process for fixing common chips and cracks in your fireplace.
Step 1: Prepare your materials.
Here are the tools you will need.
- Limestone repair kit or color-matched epoxy resin
- Fine-grit sandpaper
- Clean cloth
- Mild detergent
- Small paintbrush or putty knife
- Protective gloves and eyewear
- Masking tape (optional)
Since you’ll be working with limestone materials, you may be exposed to dust and chemicals. Therefore, it’s important to keep the work area well-ventilated. This will help minimize the risk of inhaling potentially harmful chemicals. Also, wear your protective gloves and eyewear if you’re sanding or handling abrasive materials.
Step 2: Clean the area.
Make sure it is free from dust, soot, or debris. Gently clean the surface with a clean cloth and a mild detergent mixed with water.
A mild detergent that is pH-neutral or slightly alkaline is best because it’s gentle yet effective at breaking down surface grime and stains. You want to avoid harsh chemicals and abrasive cleaners as these can cause irreversible damage to the limestone. Anything acidic, such as vinegar, lemon, or bleach, should be avoided. Similarly, abrasive cleaning tools like scouring pads and wire brushes should be avoided as they can scratch the limestone surface.
When mixing the cleaning solution, use warm water that’s comfortable to touch instead of hot water. Hot water might cause thermal shock to the limestone surface, which could potentially worsen the crack or damage.
After you’ve cleaned the area and rinsed it with water, wait for it to dry completely.
Step 3: Prepare the repair material.
Before handling any of these materials, put on your protective gloves. If you’re using epoxy resin, mix it according to the manufacturer’s guidelines. You’ll need to choose one that’s specifically formulated for stone repair. They are designed to stick well to limestone and provide a durable, long-lasting repair.
Epoxy resin typically requires equal parts resin and hardener for proper curing. Mix them until they are fully blended. No streaks or swirls should remain in the mixture. You should aim for a smooth, creamy consistency. If it’s too thin or too runny, add small amounts of filler material like limestone dust or powdered pigments until you get the desired consistency.
You’ll also be tinting the epoxy resin to match the color of the limestone. Add powdered pigments or liquid colorants in small amounts until you achieve the desired shade. Be careful not to add too much colorant, as this can affect the curing process of the epoxy resin.
Test the color match of your filler on a small, inconspicuous area before applying it to the chip or crack. Adjust the colorant as necessary until you achieve a seamless match.
Step 4: Apply the filler
Using a small paintbrush or a putty knife, carefully apply the filler material to the chip or crack. Fill the damage, but be careful not to overfill.
If the crack is deep, apply the filler in layers, spread it evenly, and press firmly into place. Let each layer dry before applying the next. This process will prevent air bubbles from forming in the filler material and help you achieve a smooth and level finish.
Step 5: Smooth the surface
Once the filler is in place, use a putty knife to smooth it out. Ideally, the putty knife you use has a flexible blade and a width suitable for the size of the repair area. This allows for a more efficient and precise application.
You may also use a high-quality, fine-bristled paintbrush to help spread the filler evenly and minimize brush marks. Using the paintbrush, feather the edges of the filler slightly, using gentle, sweeping motions to blend it with the surrounding limestone.
Make sure it’s level with the surrounding surface. If you overfilled slightly, wait for the filler to settle (but not completely hardened) before trimming or sanding it down.
Step 6: Let it cure
Depending on the product used, the curing process can take anywhere from a few hours to overnight. Typically, epoxy resin curing time takes at least 24 hours. You want to let it cure undisturbed for a minimum of one full day so it hardens and bonds with the limestone surface effectively.
Step 7: Sand the repaired area
Once the filer is fully cured, gently sand the repaired area with sandpaper. Be careful not to exert too much pressure. You only want to smooth the filled area and not damage the surrounding stone.
Step 8: Clean up
Wipe away any dust from sanding with a damp cloth and let it dry.
Step 9: Seal the repair (OPTIONAL)
Apply limestone or stone sealer to the area that you filled. This step is optional and should only be done if the rest of your fireplace has also been sealed. The sealant may be reapplied every 1 to 3 years to maintain its effectiveness.
You’ll also need to maintain the repaired area. This includes regular cleaning to prevent dirt from accumulating, applying gentle cleaning solutions, and refraining from placing heavy objects near the repaired section.
How to Replace a Damaged Stone
Replacing damaged stone in a limestone fireplace is a meticulous process that requires patience and precision. The new stone must be blended seamlessly with the existing structure. Here is a step-by-step guide for you to follow.
Step 1: Prepare the right materials
Here’s what you’ll need:
- New limestone stone that matches your existing one
- Chisel and hammer
- Rubber or wooden mallet
- Wood shims
- Pry bar
- Heat gun or hair dryer
- Masonry saw or a tile cutter
- Mortar mix suitable for limestone
- Trowel
- Grout bag or pointing tool
- Sponge and clean water
- Dust mask, safety goggles, and gloves for protection
Step 2: Clear the area
Before you begin, put on your safety gear. Then, remove any objects from the fireplace area.
Step 3: Remove the damaged stone
For this step, you may need to ask a second person for help supporting the adjacent stones and assisting with the extraction.
Start by gently tapping around the damaged stone with a rubber or wooden mallet. This helps you recognize any loose areas where the stone may already be separated from the mortar. Pay special attention to areas where the stone may be cracked or compromised, as there’s a high chance these are loose.
Carefully chisel out the mortar around the damaged stone. Begin from the outside edges and work your way in, taking care not to damage the adjacent stones. Apply only light pressure to avoid damaging neighboring stones.
To prevent adjacent stones from shifting or getting dislodged during this process, you can insert wooden shims or wedges between the stones. This will provide support, minimizing damage to the surrounding stones.
If it doesn’t move, check for any remaining mortar bonds and remove them. You may need to apply gentle heat to the mortar using a heat gun or a hair dryer set on low heat. This will soften the mortar, making it easy to chisel away.
Once you’ve loosened the mortar, carefully pry the damaged stone away from the fireplace using a pry bar or a flat-bladed screwdriver. Work slowly and carefully to prevent sudden movements that can cause damage to the surrounding stones.
Step 4: Preparing the new stone
Measure the space where the old stone was. Use a tape measure to determine the length, width, and depth of the area. Take into account any irregularities or uneven surfaces. This is important because the new stone has to fit snugly into place.
You’ll then create a template for the new stone. Transfer the measurements on paper and, with a pencil or marker, outline the shape of the space where the stone will be installed. Include any angles or curves.
Start with a larger cut of stone, which allows you to gradually reduce the size to a perfect fit. Use a masonry saw or a tile cutter to begin making the initial cuts, following the outline of the template.
After you’ve completed the initial cuts, test-fit the stone in the designated space. It’s normal for the stone to be a bit oversized for now. You’ll be using a combination of sandpaper, rasp, or grinding wheel to gradually reduce the size of the stone
Keep checking the fit and make adjustments as needed until the stone sits snugly in place. There should be a consistent gap between the stone and the mortar. Take your time in this step because you’ll want a seamless look.
Step 5: Mixing and applying the mortar
Mix the mortar based on the manufacturer’s instructions. Keep mixing until you get a consistency that is workable but not too wet. It should have a uniform consistency, similar to thick peanut butter.
Apply a layer of mortar to the back of the new stone, making sure it’s evenly covered with no gaps or voids. Use the edge of the trowel to create grooves or ridges in the mortar, which helps improve adhesion to the fireplace.
Next, apply a layer of mortar to the fireplace area where the new stone will be placed. Again, make sure the mortar is spread evenly, covering the entire surface area. Do not apply it too thickly, as this can result in a messy overflow, weakening the bond between the stone and the fireplace.
Then, carefully position the new stone, pressing firmly to ensure good contact with the mortar. Apply a slight twisting motion to seat the stone securely in the mortar. It should be properly aligned with the adjacent stones. Pay close attention to any gaps or inconsistencies between the new stone and the surrounding fireplace, and make adjustments as needed.
Step 6: Securing the stone and finishing
Use a trowel to fill any gaps around the stone with additional mortar. Make sure that the joints between the new stone and the existing ones are filled and match the rest of the fireplace.
Use your pointing tool or grout bag to smooth out the mortar joints, ensuring they are consistent with the existing joints. Clear away excess mortar from the surface with a damp sponge. Rinse the sponge frequently in clean water every time you use it.
Step 7: Curing
Let the mortar cure according to the manufacturer’s instructions. It usually takes 24 to 48 hours.
Step 8: Sealing (OPTIONAL)
After the mortar has fully cured, apply a sealant to the new stone to protect it against stains and damage. It’s important, especially if the rest of the fireplace is sealed.
Monitor your limestone fireplace regularly and reapply sealant as needed. At least every 1 to 3 years is ideal. If you notice fading or discoloration on the limestone or that it doesn’t repel water as well, it’s time to reapply the sealant.
Pay close attention to areas constantly exposed to moisture, as these are more prone to wear and damage. Address these issues immediately with repair to prevent further damage. When placing hot or heavy objects on a limestone surface, use a coaster or trivet to prevent scratches or heat damage.
If your fireplace already has major damage, such as structural cracks, deep staining, loose or missing stones, severely damaged sections, or extensive efflorescence and mold, it’s best to get a professional who can help repair your fireplace.
Troubleshooting Common Issues
When trying to replace limestone in your fireplace, you may come across some common issues. Here’s how to fix them:
1. The mortar is not setting correctly
- Causes:
- Incorrect mixing ratio
- Inadequate curing time
- Low temperature or excessive moisture
- Solutions:
- Check the mortar solution and make sure the proper ratio was applied in the mixture.
- You may also just need to allow for more curing time.
- If you’re working in an excessively cold or damp environment, make sure there is enough ventilation.
- If possible, use supplemental heat or a fan to hasten the drying time.
2. Gaps being too wide or narrow
- Causes:
- Inaccurate measurements
- Uneven surfaces
- Improper application of mortar
- Solutions:
- Take precise measurements and make adjustments as needed before cutting the new stone.
- Make sure that the surface is even before applying the mortar. If the gaps are too wide, use additional mortar to fill them. If it’s too narrow, remove excess mortar with a tool or add thin shims to create space.
3. New stone not sitting flush with adjacent stones
- Causes:
- Uneven surface
- Irregular cuts
- Inadequate pressure during installation
- Solutions:
- Use a level and shims to adjust the stone’s alignment. If the new stone is not sitting flush, carefully remove it and inspect the mortar bed for inconsistencies.
- Make adjustments to the mortar’s thickness or the stone’s shape as needed.
- Reinstall the stone with even pressure to ensure a snug fit
4. Messy overflow of mortar
- Causes:
- Excessive mortar application
- Uneven pressure during installation
- Solutions:
- Apply mortar sparingly and evenly. Use a trowel or putty knife to get rid of excess mortar immediately after application
- Wipe the remaining residues with a damp sponge or cloth before it hardens.
- Make sure to maintain clean lines and smooth transitions between stones.
5. Inadequate adhesion or bonding
- Causes:
- Insufficient preparation of the surface
- Incompatible materials
- Improper mortar application
- Solutions:
- Clean and roughen the surface areas to promote adhesion
- Double-check to make sure that the mortar is properly mixed and applied according to the manufacturer’s instructions
- Avoid mixing different types of mortar or adhesive
- Apply even pressure during installation and allow for adequate curing time
Professional Limestone Fireplace Repair Services
If you’re unsure about the repair or the damage on your limestone fireplace seems too extensive to be fixed with a DIY solution, it’s best to consult with a professional who specializes in stone repair.
They can assess the extent of the damage and provide solutions that address underlying issues. They can also assist you in restoring your fireplace, making sure the repair is done correctly and matches the surrounding area.
Maintenance Tips for Limestone Fireplaces
Maintaining a limestone fireplace involves a combination of regular cleaning, protective measures, and timely repairs to preserve its natural beauty and functionality. Here are essential maintenance tips you should follow to keep your fireplace in tip-top shape.
1. Clean it regularly
Clean your limestone fireplace regularly by wiping it with a soft, dry cloth to prevent dust build-up. If you want to clean it more thoroughly, use a soft cloth dampened with water and a small amount of mild pH-neutral soap. Rinse the surface with a clean, damp cloth and dry thoroughly to avoid water spots
2. Clean spills and stains immediately
Limestone is porous. Therefore, it tends to stain easily. If there are any spills, clean them immediately with a soft damp cloth. Instead of wiping spills, which only spreads and pushes the stain deeper into the limestone pores, you want to blot it. Press down firmly and let the cloth absorb as much of the spill as possible without rubbing or scrubbing.
Don’t use acidic cleaners or harsh chemicals, as they can etch or damage the surface. Only use cleaners designed for natural stone, such as mild detergents that are pH-neutral.
For persistent stains, you can use a poultice designed for limestone. It’s a paste specially formulated to draw out stains from stone. Typically, you’ll need a mix of poultice powder and water to create a thick paste.
Using a plastic or wooden spatula, apply the poultice paste evenly over the entire stained area, extending slightly beyond the edges of the stain. Then, cover it with plastic wrap or wax paper to create a seal.
Leave the poultice overnight to dry, then carefully remove the covering after the drying process. Scrape away the dried poultice using a plastic or wooden spatula. Once it’s removed, rinse the surface with clean water to remove the residue.
Stubborn stains may require you to repeat the poultice application process until it’s completely removed. After the stains have been successfully removed, reapply a sealer on the limestone to protect it against future stains and spills.
3. Protect with a sealant and use padding
One way to preserve the integrity of limestone and protect it from spills is to apply a high-quality sealant. There are two types of sealants commonly used for limestone: penetrating sealants and surface sealants.
Penetrating sealants, also called impregnating sealants, penetrate the pores of the limestone to form a protective barrier below the surface. This allows long-lasting protection against moisture, stains, and other contaminants. They’re breathable, which means they allow moisture vapor to escape the stone, preventing moisture from getting trapped. This minimizes the risk of efflorescence or premature wear.
Surface sealants, also known as topical sealants, create a protective layer on the limestone surface. This provides a strong barrier against spills and stains, making them easy to clean and maintain. They typically come in gloss or matte finish options, so you can choose one that best fits your aesthetic needs.
Some surface sealants also provide UV protection, which means they can help prevent limestone from fading and discoloration caused by the sun.
Whichever sealant you choose, it’s important that you clean the fireplace before applying it. Remove any dirt or dust on the limestone with mild detergent and warm water, rinse with clean water, and let the fireplace dry completely. Then, test the sealant in a small area to make sure it’s the right finish you want.
Work in small sections, making sure you apply it on the surface evenly and avoid missed spots. Let the sealant dry completely before using the fireplace
If you place decorative items on your limestone fireplace mantel, make sure to place felt or rubber pads underneath to prevent scratches on the limestone surface. Avoid putting items that produce heat, such as candles, lamps, or fireplace inserts. If you must, place a heat-resistant mat underneath hot objects.
Also, consider rotating the placement of decorative items to distribute weight and prevent uneven wear on the stone’s surface. Prolonged exposure to natural and artificial light can cause fading and discoloration, so rotating decor items help minimize these effects.
4. Repair chips, cracks, and moisture problems immediately
Have a stone repair kit handy in case some small chips and cracks need immediate repair. For larger damages, don’t wait. Call a professional stone restorer right away.
You should also look for powdery white deposits, which indicate water seepage. Brush off the deposits and try to identify the source of the moisture. Check for leaks in nearby plumbing, roof, or windows. Inspect the outside of the building for cracks, gaps, or areas where water could penetrate. You’ll need to seal these openings to prevent moisture from infiltrating your home.
Moisture can adversely affect limestone surfaces, so you’ll need to manage moisture levels in the air. Ensure proper ventilation by installing exhaust fans or vents near high-moisture areas. When possible, install a dehumidifier in these areas, as this can help extract moisture, inhibiting the growth of mold and mildew.
Conclusion
Proper maintenance and timely repair are crucial for preserving the limestone fireplace’s natural beauty. Regular cleaning, sealing, and attentive care can prevent damage from stains, cracks, and wear, keeping your fireplace an elegant focal point in your home.
Moreover, addressing issues right away avoids costly repairs down the line, ensuring that your fireplace continues to provide warmth and ambiance efficiently.
Don’t let your limestone fireplace lose its charm and functionality. Schedule a professional cleaning and repair today to restore its beauty and ensure its safe operation for years to come.